So you’ve heard about blogging and decided to create and start a blog site for your business or passion.
Or
People keep on telling you that you should start a blog (because you can earn from it).
The problem is that you don’t know how to start or you don’t have a technical background in programming. But here’s the good news: creating a blog site is easier than you think.
I’ve been blogging for more than 7 years and I can say that I am the best at doing it. Some of my blogs have been mentioned in different publications and received awards.
I’m also earning from blogging and using it as a content marketing channel for my own business websites and customers.
This page is dedicated to helping you create and get started on blogging.
Remember however that reading and understanding something is light-years away from doing it. Make sure to take action if you want to unlock the amazing opportunities that blogging can give you.
Table of Contents
Toggle4 Simple Steps on How To Create and Start Your Own Blog Site
Step 1: Get a Domain and Hosting
The first thing that you should do is get a hosting and then register a domain name for your blog site.
What do you want your domain name to be?
This part is fun and the most exciting so make sure to brainstorm as many different ideas as possible. Once you’ve thought of some possible names, head to HostGator. The best thing that I love about HostGator is that it gives you a vast array of tools to take your blog online with ease.
For starters, I recommend that you sign up for their Shared Web Hosting Hatchling Plan, which offers unlimited disk space and bandwidth. It can also save you cash. If you are planning to create more than one domain or blog, choose Baby Plan.
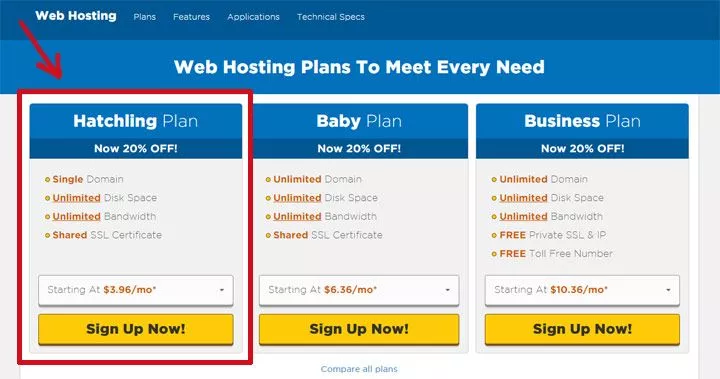
Once you click the “Sign up” button, you will be redirected to their checkout page. On this page, you can put the domain name that you wish to register.
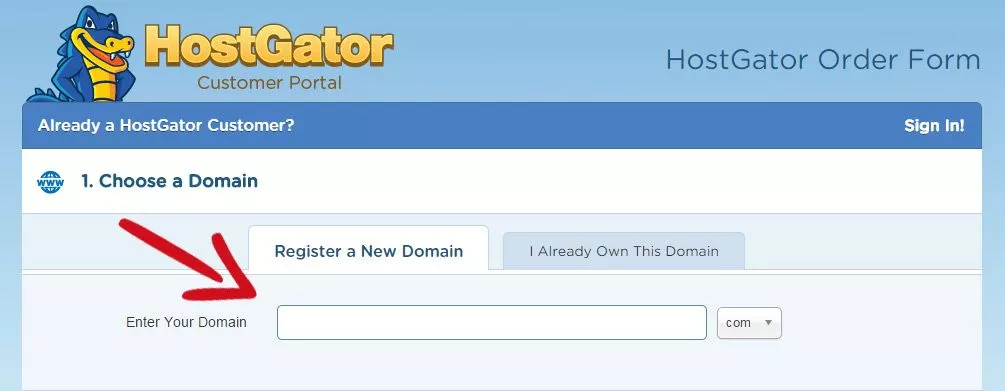
During the checkout process, you have an option to add additional services. I highly encourage you to add a Domain Privacy Protection. This feature helps you protect your identity online from being displayed by the public.

2. Install WordPress
WordPress is by far the best blogging software. It’s the software that I use to run my blogs and websites. It’s also easy to use and easy to install.
Once you’ve completed the registration with HostGator, log in to the control panel that they provided. From there, you’ll need to go through the process of installing WordPress.
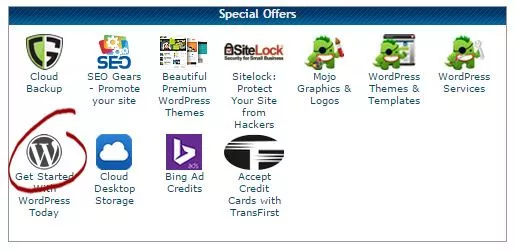
Once logged in, find the WordPress logo under the “Special Offers” section. Then, click it.
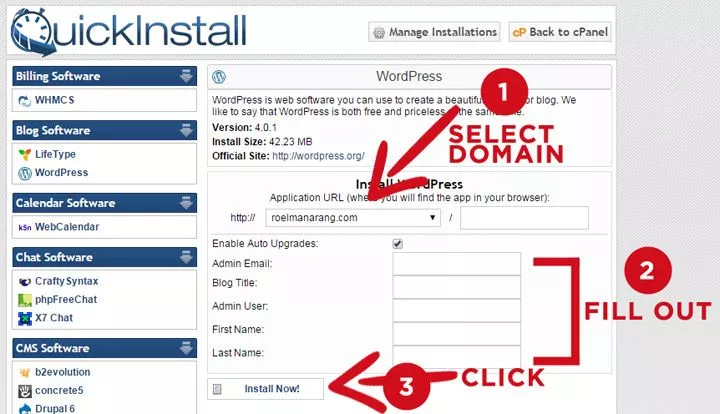
After clicking the WordPress logo, you will be redirected to the QuickInstall WordPress dashboard. From there, click “Continue”, select your domain, fill out the fields, and click “Install Now”.
You should see the message that says “Congratulations!” including the login credentials.
Write down your admin area URL, username, and password. You can change these login credentials later according to your preference, but you’ll need them for your first log-in.

Type your admin area URL into your web browser, and you should see a login screen similar to the image below. Afterward, you just need to enter your username and password.
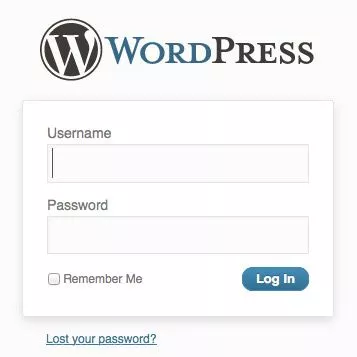
There you go! You have officially logged in and created your blog. Congratulations!
3. Find a Theme to Make It Beautiful
At this point, you officially have your own blog. Moreover, you’re only minutes away from sharing the things you are passionate about. But before you can do it, now is the time to pick your theme.
I love beautiful, powerful, and converting designs. WordPress offers lots of free WordPress themes to pick from. You can check your options here. However, if you’re looking for a premium theme, I recommend The Genesis Framework or buy at ThemeForest.
- The Genesis Framework – This is by far one of the best WordPress themes out there since it’s fast and powerful. It was the first theme that I used for most of my blogs.
- ThemeForest – This is where I purchase most of the beautiful WordPress themes that I use for different purposes—blogging, corporate, directories, support—you name it.
- Elegant Themes – Easy to use, great deals, and beautiful. Their themes are also a bit cheaper than the other premium themes in the WordPress theme market.
4. Install WordPress Plug-ins
Now that you have created your own blog and installed your beautiful theme, it’s time to make it powerful by installing plug-ins.
Plug-ins are tools that extend and add functionality that already exists in WordPress. The core of WordPress is designed to be lean and lightweight to maximize flexibility and minimize code bloat. Plug-ins offer custom functions and features so that each user can tailor his/her site to specific needs.
I only use a few plug-ins on my website. The following is the list of WordPress plug-ins that I can’t live without.
- Digg Digg (free) – This plug-in is used for social sharing buttons.
- WordPress SEO by Yoast (free) – This is the first true all-in-one SEO solution for WordPress, including on-page content analysis, XML sitemaps, and much more.
- Google Analytics by Yoast (free) – This plug-in simplifies adding Google Analytics to your WordPress site and adding lots of features (e.g., error page, search result, automatic outgoing links, and download tracking).
- Limit Login Attempts (free) – It limits the log-in attempt rate, including by way of cookies, for each IP; works great in combination with Simple IP Ban (free).
- WPBakery Visual Composer (paid) – A must WordPress plugin! This is a drag-and-drop page builder for WordPress. You can take full control of your WordPress site and build any layout you can imagine—no programming knowledge is required.
- W3 Total Cache (free) – It is a complete and the highest-rated WordPress performance plug-in. It dramatically improves the speed and user experience of your site. It allows you to add browser, page, object, and database caching as well as minify and content delivery network (CDN) to WordPress.
To install WordPress plugins: Log in to your WordPress blog, go to Plugins, and click Add New.
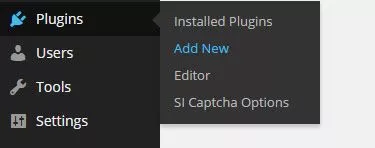
And there you have it!
Roel Manarang is a seasoned digital marketer and designer with over a decade of experience helping businesses achieve online success. As the Director of Operations at Workroom, he combines his passions for design and marketing to deliver exceptional results for his clients. With a proven track record of delivering exceptional results for more than 100 businesses, Roel is a sought-after creative strategist specializing in world-class content, websites, SEO, and social media campaigns. Find him on Instagram, LinkedIn, and YouTube.
Subscribe And Receive Free Digital Marketing Tips To Grow Your Business
Join over 8,000+ people who receive free tips on digital marketing. Unsubscribe anytime.


